Table of Contents |
guest 2025-04-30 |
Docker
Installing nnUNet
Slicer
Remote Pipeline
SSH Key generation
Jupyter-Hub
Warhol Installation
Jama installation
R Packages
Klimt installation
Klimt reverse proxy
Data Repository
XNAT installation
XNAT OHIF notest
Adding pipeline
Labkey Virtual Machine
Accessing NIX secured web pages
Rubens Installation
NIXfying code
Add new processing machine
Managing nixWorker account
Deep medic (non-GPU)
Labkey-UKC
QSPECT
Web Page
Van Gogh installation
udev 63G 0 63G 0% /dev
tmpfs 13G 9.4M 13G 1% /run
/dev/nvme0n1p1 59G 1.3G 55G 3% /
tmpfs 63G 0 63G 0% /dev/shm
tmpfs 5.0M 0 5.0M 0% /run/lock
tmpfs 63G 0 63G 0% /sys/fs/cgroup
/dev/nvme0n1p3 234G 61M 222G 1% /home
/dev/nvme0n1p4 564G 73M 536G 1% /data
/dev/sda1 5.5T 89M 5.2T 1% /data1
tmpfs 13G 0 13G 0% /run/user/1000
- Install sudo (apt-get install sudo)
- Add user to sudo list (usermod -G sudo user)
- in /etc/passwd update root's shell to /usr/sbin/nologin
- Copy public key from remote account to the server (cat id_rsa.pub at remote; copy key to .ssh/authorized_keys on server)
- Edit /etc/ssh/sshd_config ChallengeResponseAuthentication no
#in newer sshd, this changed to
KbdInteractiveAuthentication no
PasswordAuthentication no
#UsePAM no
PermitRootLogin no
#PermitRootLogin prohibit-password
- Restart sshd; /etc/init.d/sshd restart
4.19.0-17-amd64
Install gcc:sudo apt-get install gcc
Gcc version:gcc (Debian 8.3.0-6) 8.3.0
LIBC version:ldd (Debian GLIBC 2.28-10) 2.28
Install headers:sudo apt-get install linux-headers-$(uname -r)
Get and install CUDA (downloads ~ 1 GB):sudo apt-get install gnupg
sudo apt-key adv --fetch-keys https://developer.download.nvidia.com/compute/cuda/repos/debian10/x86_64/7fa2af80.pub
sudo add-apt-repository contrib
sudo apt-get update
sudo apt-get -y install cuda
sudo shutdown -r now
Adjust paths:export PATH=${CUDA}/bin${PATH:+:${PATH}}
export LD_LIBRARY_PATH=${CUDA}/lib64${LD_LIBRARY_PATH:+:${LD_LIBRARY_PATH}}
NVRM version: NVIDIA UNIX x86_64 Kernel Module 470.42.01 Tue Jun 15 21:26:37 UTC 2021
GCC version: gcc version 8.3.0 (Debian 8.3.0-6)
nvcc: NVIDIA (R) Cuda compiler driver
Copyright (c) 2005-2021 NVIDIA Corporation
Built on Wed_Jun__2_19:15:15_PDT_2021
Cuda compilation tools, release 11.4, V11.4.48
Build cuda_11.4.r11.4/compiler.30033411_0
cd NVIDIA_CUDA-11.4_Samples
make
bin/x86_64/linux/release/deviceQuery Starting...
CUDA Device Query (Runtime API) version (CUDART static linking)
Detected 2 CUDA Capable device(s)
Device 0: "NVIDIA RTX A5000"
CUDA Driver Version / Runtime Version 11.4 / 11.4
CUDA Capability Major/Minor version number: 8.6
Total amount of global memory: 24256 MBytes (25434259456 bytes)
(064) Multiprocessors, (128) CUDA Cores/MP: 8192 CUDA Cores
GPU Max Clock rate: 1695 MHz (1.70 GHz)
Memory Clock rate: 8001 Mhz
Memory Bus Width: 384-bit
L2 Cache Size: 6291456 bytes
Maximum Texture Dimension Size (x,y,z) 1D=(131072), 2D=(131072, 65536), 3D=(16384, 16384, 16384)
Maximum Layered 1D Texture Size, (num) layers 1D=(32768), 2048 layers
Maximum Layered 2D Texture Size, (num) layers 2D=(32768, 32768), 2048 layers
Total amount of constant memory: 65536 bytes
Total amount of shared memory per block: 49152 bytes
Total shared memory per multiprocessor: 102400 bytes
Total number of registers available per block: 65536
Warp size: 32
Maximum number of threads per multiprocessor: 1536
Maximum number of threads per block: 1024
Max dimension size of a thread block (x,y,z): (1024, 1024, 64)
Max dimension size of a grid size (x,y,z): (2147483647, 65535, 65535)
Maximum memory pitch: 2147483647 bytes
Texture alignment: 512 bytes
Concurrent copy and kernel execution: Yes with 2 copy engine(s)
Run time limit on kernels: No
Integrated GPU sharing Host Memory: No
Support host page-locked memory mapping: Yes
Alignment requirement for Surfaces: Yes
Device has ECC support: Disabled
Device supports Unified Addressing (UVA): Yes
Device supports Managed Memory: Yes
Device supports Compute Preemption: Yes
Supports Cooperative Kernel Launch: Yes
Supports MultiDevice Co-op Kernel Launch: Yes
Device PCI Domain ID / Bus ID / location ID: 0 / 1 / 0
Compute Mode:
< Default (multiple host threads can use ::cudaSetDevice() with device simultaneously) >
Device 1: "NVIDIA RTX A5000"
CUDA Driver Version / Runtime Version 11.4 / 11.4
CUDA Capability Major/Minor version number: 8.6
Total amount of global memory: 24256 MBytes (25434652672 bytes)
(064) Multiprocessors, (128) CUDA Cores/MP: 8192 CUDA Cores
GPU Max Clock rate: 1695 MHz (1.70 GHz)
Memory Clock rate: 8001 Mhz
Memory Bus Width: 384-bit
L2 Cache Size: 6291456 bytes
Maximum Texture Dimension Size (x,y,z) 1D=(131072), 2D=(131072, 65536), 3D=(16384, 16384, 16384)
Maximum Layered 1D Texture Size, (num) layers 1D=(32768), 2048 layers
Maximum Layered 2D Texture Size, (num) layers 2D=(32768, 32768), 2048 layers
Total amount of constant memory: 65536 bytes
Total amount of shared memory per block: 49152 bytes
Total shared memory per multiprocessor: 102400 bytes
Total number of registers available per block: 65536
Warp size: 32
Maximum number of threads per multiprocessor: 1536
Maximum number of threads per block: 1024
Max dimension size of a thread block (x,y,z): (1024, 1024, 64)
Max dimension size of a grid size (x,y,z): (2147483647, 65535, 65535)
Maximum memory pitch: 2147483647 bytes
Texture alignment: 512 bytes
Concurrent copy and kernel execution: Yes with 2 copy engine(s)
Run time limit on kernels: No
Integrated GPU sharing Host Memory: No
Support host page-locked memory mapping: Yes
Alignment requirement for Surfaces: Yes
Device has ECC support: Disabled
Device supports Unified Addressing (UVA): Yes
Device supports Managed Memory: Yes
Device supports Compute Preemption: Yes
Supports Cooperative Kernel Launch: Yes
Supports MultiDevice Co-op Kernel Launch: Yes
Device PCI Domain ID / Bus ID / location ID: 0 / 33 / 0
Compute Mode:
< Default (multiple host threads can use ::cudaSetDevice() with device simultaneously) >
> Peer access from NVIDIA RTX A5000 (GPU0) -> NVIDIA RTX A5000 (GPU1) : Yes
> Peer access from NVIDIA RTX A5000 (GPU1) -> NVIDIA RTX A5000 (GPU0) : Yes
deviceQuery, CUDA Driver = CUDART, CUDA Driver Version = 11.4, CUDA Runtime Version = 11.4, NumDevs = 2
Result = PASS
[CUDA Bandwidth Test] - Starting...
Running on...
Device 0: NVIDIA RTX A5000
Quick Mode
Host to Device Bandwidth, 1 Device(s)
PINNED Memory Transfers
Transfer Size (Bytes) Bandwidth(GB/s)
32000000 26.2
Device to Host Bandwidth, 1 Device(s)
PINNED Memory Transfers
Transfer Size (Bytes) Bandwidth(GB/s)
32000000 27.1
Device to Device Bandwidth, 1 Device(s)
PINNED Memory Transfers
Transfer Size (Bytes) Bandwidth(GB/s)
32000000 649.0
Result = PASS
NOTE: The CUDA Samples are not meant for performance measurements. Results may vary when GPU Boost is enabled.
mv cuda-repo-ubuntu1804-10-0-local-10.0.130-410.48_1.0-1_amd64 cuda-repo-ubuntu1804-10-0-local-10.0.130-410.48_1.0-1_amd64.deb
sudo dpkg -i cuda-repo-ubuntu1804-10-0-local-10.0.130-410.48_1.0-1_amd64.deb
sudo apt-key add /var/cuda-repo-10-0-local-10.0.130-410.48/7fa2af80.pub
sudo apt-get update
sudo apt-get install cuda-libraries-10-0
wget https://www.python.org/ftp/python/3.6.14/Python-3.6.14.tgz
tar xvzf Python-3.6.14.tgz
cd Python-3.6.14
./configure --enable-optimizations
make -j 4
53 test_cmd_line failed
90 test_curses skipped (resource denied)
101 test_devpoll skipped
149 test_gdb skipped
170 test httplib:ConnectionResetError: [Errno 104] Connection reset by peer
173 test_imaplib:ConnectionResetError: [Errno 104] Connection reset by peer
192 test_kqueue skipped
216 test_msilib skipped
219 test_multiprocessing_fork skipped
220 test_multiprocessing_forkserver skipped
221 test_multiprocessing_main_handling skipped
222 test_multiprocessing_spawn skipped
234 test_ossaudiodev skipped (resource denied)
298 test_smtpnet skipped (resource denied)
301 test_socketserver skipped (resource denied)
307 test_startfile skipped
320 test_subprocess skipped
345 test_timeout skipped (resource denied)
346 test_tix skipped (resource denied)
347 test_tk skipped (resource denied)
353 test_ttk_guionly skipped (resource denied)
test_urllib2_localnet: [Errno 104] Connection reset by peer
test_urllib2net skipped (resource denied)
test_urllibnet skipped (resource denied)
test_winconsoleio skipped
test_warnings failed
test_winreg test_winsound skipped (resource denied)
test_winsound skipped (resource denied)
400 test_xmlrpc_net skipped (resource denied)
404 test_zipfile64 skipped (resource denied)
sudo make altinstall
Docker
Installation of Docker
More infor here. Requirements are met since we are running debian10.
Uninstall potentially conflicting version of docker:
sudo apt-get remove docker docker-engine docker.io containerd runc
Prepare to update repositories:
sudo apt-get update
In my case, errors of the type
Repository 'http://deb.debian.org/debian buster InRelease' changed its 'Version' value from '10.10' to '10.11'
cropped up, and apparently the cure is to allow release info change:
sudo apt-get --allow-releaseinfo-change update
I also had to remove/comment out an old docker release source in /etc/apt.d/sources.list for sudo apt-get update to return no error or warnings.
Install dependencies:
sudo apt-get install apt-transport-https ca-certificates curl gnupg lsb-release
(all were already satisfied)
Add docker repository (debian!)
curl -fsSL https://download.docker.com/linux/debian/gpg | sudo gpg --dearmor -o /usr/share/keyrings/docker-archive-keyring.gpg
echo "deb [arch=$(dpkg --print-architecture) signed-by=/usr/share/keyrings/docker-archive-keyring.gpg] https://download.docker.com/linux/debian $(lsb_release -cs) stable" | sudo tee /etc/apt
/sources.list.d/docker.list > /dev/null
Neat. The docker repository is in an aptly named file docker.list under /etc/apt/sources.list.d
sudo apt-get update
sudo apt-get install docker-ce docker-ce-cli containerd.io docker-compose-plugin
Check that it is running:
sudo docker run hello-world
Success.
Installing nnUNet
First create a virtual environment:
virtualenv ~/venv/nnUNet -p python3
Activate the virtual environment:
. ~/venv/nnUNet/activate
Install all the required packages - they are written in requirments.txt, found here :
pip install ~/software/src/venv/nnUNet/requirements.txt
In order for all the packages to match, we have to install these separately:
pip3 install torch torchvision torchaudio --extra-index-url https://download.pytorch.org/whl/cu113
Than also install nnUNet:
pip install nnunet
And you are done! You have created nnUNet virutal environment!
To deactivate virtual environment: deactivate
Slicer
Slicer on headless server
Copy tgz from slicer3d.org. The link in browser works, but doesn't get renamed with wget, so do it manually afterwards.
wget https://slicer-packages.kitware.com/api/v1/item/60add706ae4540bf6a89bf98/download
mv download Slicer-4.11.20210226-linux-amd64.tar.gz
From webpage, the revision number of the download was 29738. Typically, Slicer will first complain of missing libraries.
sudo apt-get install libglu1-mesa libpulse-mainloop-glib0
But later, an error like the following may be seen
Could not load the Qt platform plugin "xcb" in "" even though it was found
This is in fact the same error as above, save that it is a bit harder to decipher the missing libraries. Following suggestion re-run with QT_DEBUG_PLUGINS flag set:
export QT_DEBUG_PLUGINS=1
~/software/install/Slicer/Slicer
In my case, libxcb-icccm is missing:
Cannot load library /home/studen/software/install/Slicer-4.11.20210226-linux-amd64/lib/QtPlugins/platforms/libqxcb.so:
  (libxcb-icccm.so.4: cannot open shared object file: No such file or directory)
Install the missing libraries:
sudo apt-get install libxcb-icccm4 libxcb-image0 libxcb-keysyms1 libxcb-randr0
  libxcb-render-util0 libxcb-xinerama0 libxcb-xkb1 libxkbcommon-x11-0
XPRA, an X emulator
To run Slicer, an X11 incarnation is required. By default, processing PCs have no X11 interface, and an alternative is required.
sudo apt-get install xpra
XPRA has many interesting characteristics which makes it excellent to use as a dummy X server. See more in documentation. Usage examples:
- Start slicer remotely. Connect via terminal to vangogh and start xpra first:
xpra start :210
~studen/software/install/Slicer/Slicer
Now use attach method below to connect to this session
- Linux: start a new session from your laptop:
xpra start ssh://vangogh/210 --start-child=/home/studen/software/install/Slicer/Slicer. Detach withCtrl-Cor using the system tray menu. - Linux: connect to running session from your laptop:
xpra attach ssh://vangogh/210. This works for sessions started remotely or from your laptop. - Windows from laptop: Download installer and install. Run XPRA, select Connect and fill as shown below, username is your vangogh username:
| Mode | SSH |
| Server | username @ 172.16.21.37:22 |
| Display | 210 |
| Command | /home/studen/software/install/Slicer/Slicer |
See [screenshot][image].
I used 210 to be consistent with *nx setup, but display should be unique. No password - rubens is configured to use ssh keys. Disconnect is hidden in system tray - right click on XPRA system tray icon reveals it. Disconnecting leaves the process running on vangogh and later the same session can be joined via Connect button - make sure you remember your display id
Notes on running xpra on Windows (developers)
For developers. A remote username must be configured and Slicer should be started in that remote unit to isolate it from other users. The remote unit must contain user credentials to access LabKey. Such credentials must be copied (once?) from local machine. This must be done using complicated tools like WinSCP, scp from command window or similar, that require coarse knowledge of *nix that might exceed users interest. Other data (images, etc.) are then loaded via LabKey. Ideal workflow - User starts xpra using the instructions above and gets an operating Slicer window which is in the background already connected to LabKey. Solution: the user directory comes with preloaded zip file, which is then imported via LabKey.
[image]: 'Screenshot at 2021-11-15 09-25-56.png'
Remote Pipeline
Notes on using LabKey as a socket client to initiate analysis on remote processing PC
Local job execution managed by LabKey
LabKey was modified to initiate pipeline jobs on local machine using trigger script machinery. The process was split between two pieces of software:
- LABKEY/analysisModule. The analysis module runs on LabKey server, written in javascript and combines data from instruction list (Runs), json configuration from Analysis/@files/configurationFiles to initiate a python script that will run as user tomcat8 on LabKey server. The actual python scripts are part of project specific code and are expected to be in standard software directories (e.g. /home/nixUser/software/src). The task of the module is to format a shell script command that will combine items from the line and execute it.
- LABKEY/analysisInterface. This is a set of overhead python routines that will delegate execution to project specific scripts and will manage program execution flags (PROCESSING, FAILED, DONE) and log files that are shown together with job execution.
- The native pipeline execution was abandoned due to lack of flexibility.
Remote job execution model
Processing PCs are kept distinct from the database PCs. LabKey requires such processing PCs to run an equivalent LabKey software, which makes the infrastructure overwhelming. Some thoughts:
- As a replacement, python socket model is suggested. Identically,
analysisModuleformats the call, but sends it to socket rather than executes it directly. Since combining sockets over multiple programming language may be cumbersome, probably best to still start a shell command, but there should be a flag that tellsanalysisInterfaceto start the job remotely. - Remote sockets starts a python job involving
analysisInterface; this is identical to current system call performed byanalysisModule, except in python, which might enable some shortcuts, ie starting from python. The nice thing about shells is that they run as new threads. However, previous item already hasanalysisInterfacerunning socket client, so it might be best foranalysisInterfaceto use sockets directly. -
analysisInterfaceruns on processing PC and manages the (local) logs and execution. The status on the initiating job is updated via embedded labkey/python interface and no additional sockets are needed. Log file can be transmitted at the end of the job, although running updates might be of interest, which may be handled byanalysisInterfaceusing smart uploading strategies that append rather than transmit full files. - Due to asynchronity of the submissions, a queue could be implemented at the processing PC site, probably by the
analysisInterfaceto make the socket itself as transparent as possible. Which begs the question on how could processes initiated by different users be aware of each other. But wait - the user running the socket will be the single user that will execute the code, hence a plain json database is fine. Speaking of databases - it might as well use the originating database, which will have to be modified anyhow also as a queue, eliminating the need for local json or other overhead. - This makes the remote pipeline fully opaque and the end-user has no additional overhead by using remote as opposed to local hosts.
- Let's recapitulate:
analysisInterfacegets a submit job request via socket. It checks back to server whether it has any jobs running. Here we could apply filters that would allow multiple non-interfering jobs to be run simultaneously, but prevent interfering jobs to be started. The python instance that waits in a low budget loop and checks whether its turn has come. To perserve order all jobs issued previously must reach a conclusive state (DONE/FAILED) and no QUEUED job should be ahead in queue. Then the loop completes and shell command is issued, the loop is switched to wait for completion, part of which a potential log update could be. Once job is completed, status should be changed, now critical, since further jobs might await that flag.
Network considerations
- List ports:
ss -tulpn | grep LISTEN - Open ports
iptables -I INPUT -p tcp -s X.X.X.X/32 --dport 8765 -j ACCEPTiptables -A INPUT -p tcp -s 0.0.0.0/0 --dport 8765 -j DROP - Remove iptables rule:
sudo iptables -D INPUT -m conntrack --ctstate INVALID -j DROP - Message should contain - the calling server, jobId.
analysisInterfaceshould hold a mapping of server-configuration maps. Does websockets report caller id? It does and can be used -websocket.remote_address[0]
Server setup
Processor side:
- Clone websocket. Edit
serviceScripts/env.shto changeIPSERVERandIPCLIENT - Clone analysisInterface
- Check
.labkey/setup.jsonfor proper paths and venv. Particularly, ifsoftwareSrcis set in paths. - Start server:
$HOME/software/src/websocket/serviceScripts/start.sh - Enable port:
sudo $HOME/software/src/websocket/serviceScripts/open_port.sh
Client (labkey) side:
- Check from labkey pc by cloning websocket (above), installing websockets
pip3 install websocketsand running:$HOME/software/src/websocket/send.py AA.BB.CC.DD:TEST:X, whereAA.BB.CC.DDis the ip address of the server or its name, if set by DNS. - Install websockets for
tomcat8user.
Debug
Check iptables!
SSH Key generation
SSH Key generation
To generate SSH key for Van Gogh access, do
ssh-keygen
This will generate a pair of private/public ssh keys that your program will use to access a remote resource. To generate an account, the system administrator will require the public part of the key, while the private stays with you. The public key is stored in .ssh/id_rsa.pub, please attach its content to an email and send it to the administrator. The content is a single line starting with ssh-rsa, a long string of random symbols and a name of the key, typically a username and the name of the PC.
# cat ~/.ssh/id_rsa.pub
ssh-rsa
AAAAB3NzaC1yc2EAAAADAQABAAABAQDSxY3O+S1EKJ/Dye0GxcW8mdM7ulmZmD+uQ/iG9UElTu
8szDiqKOCA+moLEgOWkwTZL3mUbfVBhwEo0ThP+IKFX2J9NmwVEQvUTH2gCtSWoyA4JeZ4xBhh
hHc2GVVmEo85a5ZmBAnD3rqHLO5ElIV84sqHgace3kxEHos0CgqZgUSVHjuAS529VZyr4AKlIY
liMdmJ6vR9Fn+W0aDaBvkTjhP/QcIobI3VmUguxRqcTZfsl5+qwrQRf/ayho3Tqytxv3R2laQb
lDUn858nElMLmatV5MQ7a9FloPNr+VyTOnQN7QYxrglA+nLn+waUGKP/ue9setPYXNXdOconfFfx
studen@DESKTOP-MJ4P6MG
This will work in Linux terminal or a program like MobaXterm used to access remote PCs in Windows.
Jupyter-Hub
Jupyter-hub
Author: Martin Horvat, Luciano Rivetti, Andrej Studen, October 2023
Install
apt-get install nodejs npm
python3 -m pip install jupyterhub
npm install -g configurable-http-proxy
python3 -m pip install jupyterlab notebook
Config
A. Generating configuration:
mkdir -p /etc/jupyterhub/systemd
cd /etc/jupyterhub
jupyterhub --generate-config
B. Generating systems service:
Edit /etc/jupyterhub/systemd/jupyterhub.service to read
----
[Unit]
Description=JupyterHub
After=syslog.target network.target

[Service]
User=root
WorkingDirectory=/etc/jupyterhub
ExecStart=jupyterhub -f /etc/jupyterhub/jupyterhub_config.py

[Install]
WantedBy=multi-user.target
Perform:
ln -s /etc/jupyterhub/systemd/jupyterhub.service /etc/systemd/system/jupyterhub.service
systemctl enable jupyterhub.service
systemctl start jupyterhub.service
Reverse-proxy
Standard setup, including certbot to generate certificate. Add instructions from documentation, the only
apache module missing was the proxy_wstunnel.
a2enmod ssl rewrite proxy headers proxy_http proxy_wstunnel
Also, add
 RewriteEngine On
  RewriteCond %{HTTP:Connection} Upgrade [NC]
  RewriteCond %{HTTP:Upgrade} websocket [NC]
  RewriteRule /(.*) ws://vangogh.fmf.uni-lj.si:8000/$1 [P,L]
to apache site configuration file under <VirtualHost>, and under <Location>
RequestHeader set "X-Forwarded-Proto" expr=%{REQUEST_SCHEME}
Test
Warhol Installation
Warhol
Warhol is a proxmox node that runs on the GPU server. In essence Warhol is GPU.
Warhol is being setup through proxmox.
To reach Warhol, first enable a pass-through to olimp or home, and start a local browser instance (chromimum) proxied over the ssh connection:
ssh -D 8082 home
#different terminal
chromium --proxy-server="socks5://127.0.0.1:8082"
Navigate to https://172.16.10.215:8006/ in Chromium, use username and password provided by Črt.
Warhol is one of the nodes in cluster (the other being kobilica and will be used as storage).
Switching to non-enterprise version
In /etc/apt/sources.list.d move existing enterprise sources to disabled:
cd /etc/apt/sources.list.d
mv pve-enterprise.list pve-enterprise.list.disabled
mv ceph.list ceph.list.disabled
Add sources that point to community proxmox edition:
echo "deb http://download.proxmox.com/debian/pve bookworm pve-no-subscription" >> pve-no-subscription.list
echo "deb http://download.proxmox.com/debian/ceph-quincy bookworm no-subscription" >> ceph-no-subscription.list
apt-get update
Setting up NVIDIA GPU
vGPU (Abandonded)
Assuming more than a single VM instance will run GPU, a vGPU strategy was employed.
To that end, nuoveau was blacklisted:
echo "blacklist nouveau" >> /etc/modprobe.d/nouveau-blacklist.conf
update-initramfs -u -k all
shutdown -r now
#after reboot, took a while
lsmod | grep no
#no output
Install DKMS:
apt update
apt install dkms libc6-dev proxmox-default-headers --no-install-recommends
It seems vGPU costs money. Alternative is a pass-through setup, where GPU is assigned to a single VM.
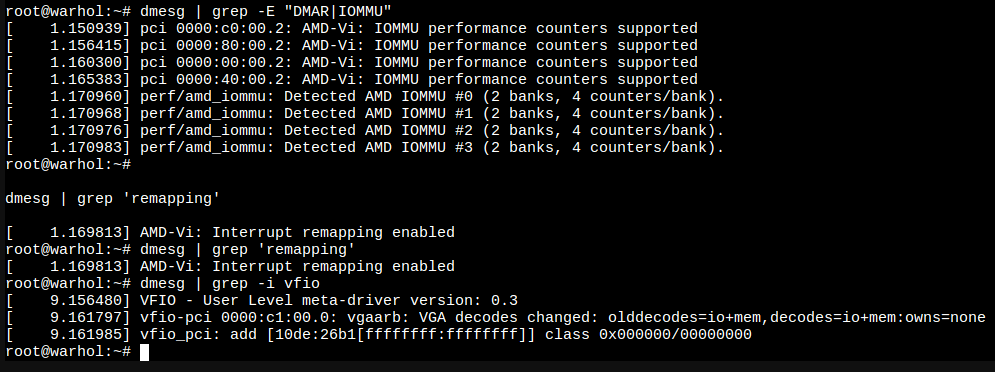
Pass-through
Following pass-through manual, also nvidia* was added to blacklisted modules.
Following official PCIe passthrough, or a forum tutorial, one should add vfio* drivers:
echo "vfio" >> /etc/modules
echo "vfio_iommu_type1" >> /etc/modules
echo "vfio_pci" >> /etc/modules
update-initramfs -u -k all
After reboot, new modules should be loaded, check with:
lsmod | grep vfio
Now, vfio is running, but NVIDIA is not associated with it, checked with:
lspci -k

First, find the PCI ID of the card:
>lspci -nn
c1:00.0 VGA compatible controller [0300]: NVIDIA Corporation AD102GL [L6000 / RTX 6000 Ada Generation] [10de:26b1] (rev a1)
ID is the number in brackets, [10de:26b1].
Then, the tutorial suggests to help modprobe determine which driver to use by:
echo "options vfio-pci ids=10de:26b1" >> /etc/modprobe.d/vfio.conf
After reboot:
lspci -k

Final checks:
The PCI has then to be added to the VM in Hardware section of the PROXMOX VME setup by clicking Add -> PCI Device -> Raw device -> navigate to GPU, I also marked All Functions check box. After that, VM was showing the GPU with lspci command.
Jama installation
Setup of jama
Jama is a known slovenian painter, and its namesake workstation will be used as GPU and analysis PC.
GPU
After Warhol setup, lspci shows the pass-through GPU:
>lspci
00:10.0 VGA compatible controller: NVIDIA Corporation AD102GL [L6000 / RTX 6000 Ada Generation] (rev a1)
00:10.1 Audio device: NVIDIA Corporation AD102 High Definition Audio Controller (rev a1)
interestingly enough, audio controller also came through on the ride. More specific,
>lspci -k
00:10.0 VGA compatible controller: NVIDIA Corporation AD102GL [L6000 / RTX 6000 Ada Generation] (rev a1)
        Subsystem: NVIDIA Corporation AD102GL [RTX 6000 Ada Generation]
        Kernel modules: nouveau
shows that no driver was loaded, but nouveau was suggested.
NVIDIA Driver (aka CUDA)
For NVIDIA drivers, I am following NVIDIA installation instructions.
Going through standard checks, gcc is required:
sudo apt-get install gcc
Get the cuda kit (web installer)
wget https://developer.download.nvidia.com/compute/cuda/repos/debian12/x86_64/cuda-keyring_1.1-1_all.deb
sudo dpkg -i cuda-keyring_1.1-1_all.deb
sudo apt-get update
sudo apt-get -y install cuda-toolkit-12-8
sudo apt-get -V install nvidia-open
#replace just with
#sudo apt -V install nvidia-driver-cuda nvidia-kernel-open-dkms
#for compute only system
And do a reboot. Driver matches the device:
>lspci -k
00:10.0 VGA compatible controller: NVIDIA Corporation AD102GL [L6000 / RTX 6000 Ada Generation] (rev a1)
        Subsystem: NVIDIA Corporation AD102GL [RTX 6000 Ada Generation]
        Kernel driver in use: nvidia
        Kernel modules: nouveau, nvidia_drm, nvidia
Post installation steps
Skipped persistenced, doesn't seem relevant.
Driver version
>cat /proc/driver/nvidia/version
NVRM version: NVIDIA UNIX Open Kernel Module for x86_64  570.86.15  Release Build  (dvs-builder@U16-I2-C03-12-4)  Thu Jan 23 22:50:36 UTC 2025
GCC version:  gcc version 12.2.0 (Debian 12.2.0-14)
Local repository removal
> sudo apt remove --purge nvidia-driver-local-repo-$distro*
E: Unable to locate package nvidia-driver-local-repo
CUDA Samples
Had to add PATH and LD_LIBRARY_PATH to .bashrc to have cmake find CUDA:
[...]
## CUDA
export PATH=/usr/local/cuda-12.8/bin${PATH:+:${PATH}}
export LD_LIBRARY_PATH=/usr/local/cuda-12.8/lib64${LD_LIBRARY_PATH:+:${LD_LIBRARY_PATH}}
Then I deleted the build portion of cuda-samples and started fresh:
cd software/src
git clone https://github.com/NVIDIA/cuda-samples.git
cd ..
mkdir build/cuda-samples
cd build/cuda-samples
cmake ../../src/cuda-samples
make -j8
Some suggested tests:
andrej@jama:~/software/build/cuda-samples/Samples/1_Utilities/deviceQuery$ ./deviceQuery
./deviceQuery Starting...

 CUDA Device Query (Runtime API) version (CUDART static linking)

Detected 1 CUDA Capable device(s)

Device 0: "NVIDIA RTX 6000 Ada Generation"
  CUDA Driver Version / Runtime Version          12.8 / 12.8
  CUDA Capability Major/Minor version number:    8.9
  Total amount of global memory:                 48520 MBytes (50876841984 bytes)
  (142) Multiprocessors, (128) CUDA Cores/MP:    18176 CUDA Cores
  GPU Max Clock rate:                            2505 MHz (2.50 GHz)
  Memory Clock rate:                             10001 Mhz
  Memory Bus Width:                              384-bit
  L2 Cache Size:                                 100663296 bytes
  Maximum Texture Dimension Size (x,y,z)         1D=(131072), 2D=(131072, 65536), 3D=(16384, 16384, 16384)
  Maximum Layered 1D Texture Size, (num) layers  1D=(32768), 2048 layers
  Maximum Layered 2D Texture Size, (num) layers  2D=(32768, 32768), 2048 layers
  Total amount of constant memory:               65536 bytes
  Total amount of shared memory per block:       49152 bytes
  Total shared memory per multiprocessor:        102400 bytes
  Total number of registers available per block: 65536
  Warp size:                                     32
  Maximum number of threads per multiprocessor:  1536
  Maximum number of threads per block:           1024
  Max dimension size of a thread block (x,y,z): (1024, 1024, 64)
  Max dimension size of a grid size    (x,y,z): (2147483647, 65535, 65535)
  Maximum memory pitch:                          2147483647 bytes
  Texture alignment:                             512 bytes
  Concurrent copy and kernel execution:          Yes with 2 copy engine(s)
  Run time limit on kernels:                     No
  Integrated GPU sharing Host Memory:            No
  Support host page-locked memory mapping:       Yes
  Alignment requirement for Surfaces:            Yes
  Device has ECC support:                        Disabled
  Device supports Unified Addressing (UVA):      Yes
  Device supports Managed Memory:                Yes
  Device supports Compute Preemption:            Yes
  Supports Cooperative Kernel Launch:            Yes
  Supports MultiDevice Co-op Kernel Launch:      Yes
  Device PCI Domain ID / Bus ID / location ID:   0 / 0 / 16
  Compute Mode:
     < Default (multiple host threads can use ::cudaSetDevice() with device simultaneously) >

deviceQuery, CUDA Driver = CUDART, CUDA Driver Version = 12.8, CUDA Runtime Version = 12.8, NumDevs = 1
Result = PASS
andrej@jama:~/software/build/cuda-samples$ ./Samples/1_Utilities/bandwidthTest/bandwidthTest
[CUDA Bandwidth Test] - Starting...
Running on...

 Device 0: NVIDIA RTX 6000 Ada Generation
 Quick Mode

 Host to Device Bandwidth, 1 Device(s)
 PINNED Memory Transfers
   Transfer Size (Bytes)        Bandwidth(GB/s)
   32000000                     26.7

 Device to Host Bandwidth, 1 Device(s)
 PINNED Memory Transfers
   Transfer Size (Bytes)        Bandwidth(GB/s)
   32000000                     26.3

 Device to Device Bandwidth, 1 Device(s)
 PINNED Memory Transfers
   Transfer Size (Bytes)        Bandwidth(GB/s)
   32000000                     4443.4

Result = PASS

NOTE: The CUDA Samples are not meant for performance measurements. Results may vary when GPU Boost is enabled.
R Packages
R-NIX R package
R gets shipped with LabKey as a default statistical tool. R provides tutorial on building packages, and rNIX is a package that implements standard functions used in R scripts within NIX environment.
Usage
If you believe a routine from rNIX would help your code, add the following lines to LabKey R-scripts:
.libPaths('/home/labkey/R/site-library')
library(devtools)
install_git('https://git0.fmf.uni-lj.si/studen/rNIX')
library(rNIX)
Development
If you want to add functions to rNIX, clone the git repository to a folder of your choice (we call it /path from now on). Follow steps from package documentation, particularly:
-
section 1.6: add code to an R file of your choice,
edit R/file.Rwhereeditis your favorite editor andfile.Ris a file of your choice. If you think your function fits one of the files already in repository, you can append the file in question. - chapter 10: check and list dependencies
- section 1.12: add documentation on function
-
section 1.10: add yourself as author in
DESCRIPTION -
section 1.12: run
document('/path')where path is the location whererNIXwas cloned -
section 1.9: run
check('/path'). Typically, a note on failed sync is printed, but other errors or warnings should be cleared prior to further steps by repeating steps from above. -
section 1.14: run
install('/path'). There are rarely problems here if previous steps were OK. -
section 1.8.1: commit changes and push them to
git0. On top of R file, there is a file with the name of the function inmandirectory, and often,DESCRIPTIONchanges as well. See what to commit by runninggit status. The last step requires write permission torNIXrepository, contactandrej.studen@fmf.uni-lj.sito grant permissions.
Klimt installation
Installation of Klimt, the resource hub
Reverse proxyKlimt reverse proxy
Reverse proxy docker image
Common network
For containers to talk to each other, a common network is required. It is a two step process:
- Manage common network
- Connect containers to the common network
Common network management
Network is started using ~/bin/startNetwork.sh and equivalent stop script by rproxy user. Network name is docker_network.
Connect containers
Add
network:
   external:
      default:
        name: docker_network
to your docker-compose.yaml. This is assuming, your docker-compose.yaml doesn't do anything special with the network already.
Docker image
A http splitter to sub-resources. So far, a generic nginx page, but switched will be added. General info in table
| User | rproxy |
| Docker Image | nginx |
| Docker compose | ~rproxy/config/rproxy-compose.yaml |
| Page X config | ~rproxy/config/conf.d/X.conf |
| Startup script | ~rproxy/bin/startRproxy.sh |
| Stop script | ~rproxy/bin/stopRproxy.sh |
| Configuration reolad: | ~rproxy/bin/reloadRproxy.sh |
Default landing page, default.conf, klimt.fmf.uni-lj.si
The default landing page points to a rproxy managed site, at ~/www/landing. The SSL is terminated with a NIXLJU-CA certificate, and HTTPS is enforced:
#HTTP -> redirect
server {
    listen       80;
    listen  [::]:80;
    server_name klimt.fmf.uni-lj.si;
    return 301 https://$host$request_uri;
}

#HTTPS
server {
    listen 443 ssl;
    listen [::]:443 ssl;
    server_name klimt.fmf.uni-lj.si;

    [...]

    #SSL
    ssl_certificate /var/www/klimtBundle.crt;
    ssl_certificate_key /var/www/klimt.key;

    [...]

    location /{
        root /var/www/landing;
    }
The first reverse proxy at rp0.fmf.uni-lj.si is configured with NIXLJU-CA_chain.crt certificate, so connection to klimt is trusted.
Invenio, invenio.conf, invenio.fmf.uni-lj.si
Identically, HTTPS is strictly enforced as for the default page. server_name is set to invenio.fmf.uni-lj.si to enable server name based routing. The processing is delegated to Invenio reverse proxy frontend. A potential scheduler/load-balancer can be extended by adding equivalent sites.
upstream frontend {
  server frontend:443;
  #could add more servers for load balancing
}

#HTTPS
server {
    listen 443 ssl;
    listen [::]:443 ssl;
    server_name invenio.fmf.uni-lj.si;

    [...]

    location /{
        proxy_ssl_trusted_certificate /var/www/NIXLJU-CA_chain.crt;
        proxy_pass https://frontend;
        proxy_redirect https://frontend https://invenio.fmf.uni-lj.si;
    }
proxy_ssl_trusted_certificate directive makes the NIXLJU-CA certificates trusted by the frontend proxy.
SSL on nginx
SSL helps protect the data between servers.
Certificates must be bundled together, ie. nginx has no SSLCACertificateFile variable in setup. The order matters, the server certificate should precede the CA certificate (chain). For NIX certificates,
cat frontend.crt NIXLJU-CA_chain.crt > frontendBundle.crt
Reverse proxy at FMF
Setup after klimt reboot
If klimt is rebooted, its IP address might change. For named services, this is OK, but at the reverse proxy of the faculty, a temporary name is assigned to maintain name resolution at klimt. The temporary name is stored in /etc/hosts on rp where fixed IP address must be used. So, at rp edit /etc/hosts/ with the correct/new IP address.
Resolved cache
IPs get stuck in cache of systemd-resolved. Clear cache by running:
systemd-resolve --flush-caches
Apache also keeps track of old IPs, so it has to be restarted to drop it:
/etc/init.d/apache2 restart
Data Repository
Data Repository
Based on turn-key solution
Installation
Had troubles with setting-up. Apparently, native python version should match image python version. Since no python3.9 image is available at docker, and debian 11 comes only with python3.9, of the two options downgrading of python was chosen.
Python downgrade
Follow instructions. Essentially:
sudo apt update && sudo apt upgrade
wget https://www.python.org/ftp/python/3.8.12/Python-3.8.12.tar.xz
sudo apt install build-essential zlib1g-dev libncurses5-dev libgdbm-dev libnss3-dev
     libssl-dev libsqlite3-dev libreadline-dev libffi-dev curl libbz2-dev -y
mkdir software/packages
mv Python-3.8.12.tar.xz software/packages/
mkdir software/build && cd software/build
tar xvf ../packages/Python-3.8.12.tar.xz
./configure --prefix=~/software/install/python3.8 --enable-optimizations --enable-shared
make -j 6 && make install
Setup virtualenv for invenio
sudo su invenio
mkdir -p virtualenv/p3.8
export LD_LIBRARY_PATH=~X/software/install/python3.8/lib:$LD_LIBRARY_PATH
~X/software/install/python3.8/bin/python3.8 -m venv ~/virtualenv/p3.8
Follow Invenio instructions
. ~/virtualenv/p3.8/bin/activate
pip install invenio-cli
invenio-cli init rdm -c v6.0
Correct some recently updated packages that break Invenio build
- Add RUN pip install MarkupSafe==2.0.1 to created Dockerfile
- Add to
docker-compose.full.yml
networks:
   default:
      external:
         name: docker_network
- Add
frontendtoAPP_ALLOWED_HOSTSininvenio.cfg - Remove exposed ports 80 and 443 from
frontendto avoid collision withrproxy. - TODO: Remove exposed port 5432 of
db.
Always run build and setup after changes to invenio.cfg.
Build
invenio-cli containers build
invenio-cli containers setup
Run containers
invenio-cli containers start
invenio-cli containers stop
rproxy exits if the proxied service is not available, so start rproxy after services.
Reroute static
XNAT installation
XNAT installation
Create a user xnat and add him to the docker group. Do the following as xnat using its home as a core of the environment.
Follow dockerizet XNAT instructions. Checkout the configuration directory and copy default environment.
From the setup directory, link xnat-data and postgres-data out from the configuration and into the storage area - to split configuration in home from storage in data.
sudo mkdir /data/xnat-data
sudo mkdir /data/postgres-data
sudo su xnat
cd ~/xnat-docker-compose
ln -s /data/xnat-data
ln -s /data/postgres-data
Some modifications might be necessary in docker-compose.yaml. For example, for XNAT to report on port 8090, lines 56 and 57 of the original should be changed to:
56 ports:
57      "8090:80"
and the port number should be added to proxy_redirect in nginx/nginx.conf, line 52 and 53
52     proxy_redirect                      http://xnat-web:8080 $scheme://localhost:8090;
53      proxy_set_header Host               $http_host;
However, should you want to use the default port, no modification should be required.
Update XNAT configuration
-
When loging in as admin to XNAT, make sure you update the SMTP settings. In my case, I had to switch to port 587, and turn identification and SSL tunneling to ON.
-
In
Administration->Site administration->DICOM SCP Receiversset AET name of the PACS to the desired value. In my case I used RUBENS as the AET name. -
Still testing the best option to merge series. Right now, I've set Prevent Cross-modality Session Merger to disabled (the text says merging is allowed) under Miscallaneous.
-
Edit Project Routing. Normally XNAT looks at a set of predefined fields to match data and project. I basically want all data to go into a single project, and a cludge to do so is putting
(0010,0020):^([0-9]+)/[0-9]+$:1 t:^(.*)$ r:IRAEMMintoSite Administration -> Session Upload & Anonymization -> Project Routing (Site Wide)configuration window. This routes anything that matches N/M where N and M are (multi-digit) numbers to IRAEMM project.
XNAT-OHIF
Install yarn:
curl -sS https://dl.yarnpkg.com/debian/pubkey.gpg | sudo apt-key add -
echo "deb https://dl.yarnpkg.com/debian/ stable main" | sudo tee /etc/apt/sources.list.d/yarn.list
sudo apt update
sudo apt install yarn
Get OHIF XNAT and compile
git clone --recurse-submodules https://bitbucket.org/icrimaginginformatics/ohif-viewer-xnat-plugin.git
cd ohif-viewer-xnat-plugin
git submodule update --init --recursive
build_plugin.sh
XNAT OHIF notest
Notes on XNAT OHIF
-
Viewer components: Toolbar is set in
extensions/xnat/src/toolbarModule.js. Here, the items on the toolbar are connected to the actual software implementations. Here I am exposing two tools, a 3D brush tool and a 3D HU gated brush tool which appear as Manual and Smart CT in the menu.const definitions = [ [...] { id: 'brushTools', label: 'Mask', icon: 'xnat-mask', buttons: [ { id: 'Brush', label: 'Manual', [...] commandOptions: { return true;
}
As far as I can tell, the algorithm is the following - as mouseDown is about to happen (some controversy there already), an initialization is performed (_startPainting). A watchdog is started that will issue an _endPainting (not explicitly shown) through _startListeningForMouseUp. A tool handler _paint is invoked for the current point. The processing of the first point completes.
Intermediate points get directed towards _paint through mouseDragEvent but not in mouseMoveEvent, toolName: PEPPERMINT_TOOL_NAMES.BRUSH_3D_TOOL },
},
{
id: 'Brush3DHUGatedTool',
label: 'Smart CT',
[...]
commandOptions: { toolName: PEPPERMINT_TOOL_NAMES.BRUSH_3D_HU_GATED_TOOL },
},
{
id: 'SphericalBrush',
label: 'Spherical',
commandOptions: { toolName: PEPPERMINT_TOOL_NAMES.XNAT_SPHERICAL_BRUSH_TOOL },
},
            [...]
        ]
        [...]
        }
]
```
-
Smart CT: I am using Smart CT is a role model for a hypothetical Smart PET, where a predefined threshold (SUV) is set on PET and a brush is used to "paint" all lesions in the area.
IntoolbarModule.jsthe Smart CT is set up to be aPEPPERMINT_TOOL_NAMES.BRUSH_3D_HU_GATED_TOOL, with mappings to classes given inextensions/xnat/src/peppermint-tools/toolNames.js:const TOOL_NAMES = { [...] BRUSH_3D_TOOL: 'Brush3DTool', BRUSH_3D_HU_GATED_TOOL: 'Brush3DHUGatedTool', XNAT_SPHERICAL_BRUSH_TOOL: 'XNATSphericalBrushTool', [...] } -
Brush3DHUGatedTool:
extensions/xnat/src/peppermint-tools/tools/segmentation/Brush3DHUGatedTool.js, descends fromBrush3DTool:export default class Brush3DHUGatedTool extends Brush3DTool { -
Brush3DTool: Lineage:
BaseTool->BaseBrushTool->BrushTool->Brush3DTool. Everything down to BrushTool is part of Cornerstone3D, one of 1848 external node dependencies of ohifxnatviewer. Cornerstone tools are part of the ohif-xnat-plugin git repository undernode_modules/cornerstone-tools:import cornerstoneTools from 'cornerstone-tools'; [...] const { BrushTool } = cornerstoneTools; [...] export default class Brush3DTool extends BrushTool { -
brush has a radius, or possibly, depth, settable through configuration object
const radius = configuration.radius; -
brush works in 2D only, although 3D is in its name. TBD why.
-
Spherical, which is anXNATSphericalBrushTool, does 3D markup. Smart PET should therefore descend from it. -
XNATSphericalBrushToolis a cornerstone-toolsSphericradius: 10, minRadius: 1, maxRadius: 50, fillAlpha: 0.2,alBrushToolimport csTools from 'cornerstone-tools'; [...] const { SphericalBrushTool } = csTools; [...] export default class XNATSphericalBrushTool extends SphericalBrushTool { constructor(props = {}) { ... } preMouseDownCallback(evt) { ... super.preMouseDownCallback(evt); } } -
all additional magic is happening in
preMouseDownCallback. -
basic behaviour from BaseBrushTool from cornerstone, lineage is
BaseTool->BaseBrushTool->BrushTool->SphericalBrushTool. -
in
BaseToolthe tool interaction model is exposed - the tool consists of declared only callbacks to standard interface events, such as:- BaseTool~preMouseDownCallback
- BaseTool~postMouseDownCallback
-
in
BaseBrushToolthe callbacks get elaborated and explicit:preMouseDownCallback(evt) { const eventData = evt.detail; const { element, currentPoints } = eventData; this._startPainting(evt); this._lastImageCoords = currentPoints.image; this._drawing = true; this._startListeningForMouseUp(element); this._paint(evt); return true; } -
As far as I can tell, the algorithm is the following - as mouseDown is about to happen (some controversy there already), an initialization is performed (
_startPainting). A watchdog is started that will issue an_endPainting(not explicitly shown) through_startListeningForMouseUp. A tool handler_paintis invoked for the current point. The processing of the first point completes. -
Intermediate points get directed towards
_paintthroughmouseDragEventbut not inmouseMoveEvent, so there must be a difference between the two, which is not yet apparent. -
In
_endPaintingthe process is reversed - the last point is shipped to_paintand the configuration is dissolved. -
_paintis abstract and conscientiously such - even an error is thrown -BaseBrushToolmust be extended.
XNATSphericalPETThresholdBrush
I started a class XNATSphericalPETThresholdBrushTool. I based it off XNATSphericalBrushTool as it already does the 3D handling. To do the thresholding, I copied _paint from SphericalBrushTool and made sure the new class imported all relevant sources. Particularly:
import csCore from 'cornerstone-core';
        const { getCircle, drawBrushPixels } = csTools.importInternal('util/segmentationUtils');
        const segmentationModule = csTools.getModule('segmentation');
Then, the viewer must be told we added the new class, and that is spread over multiple classes:
-
ohifviewerxnat/extensions/xnat/src/peppermint-tools/index.js -
ohifviewerxnat/extensions/xnat/src/peppermint-tools/tools/index.js -
ohifviewerxnat/extensions/xnat/src/peppermint-tools/toolNames.js -
ohifviewerxnat/extensions/xnat/src/toolbarModule.js -
ohifviewerxnat/extensions/xnat/src/init.js
In all cases I used XNATSphericalBrushTool as a guideline and added PET tool to the same list.
To set the threshold, we need first a place for the setting to live, Standard settings (brush size, etc.) are under segmentationModule, which is accessed through csTools. This is from Brush3DHUGatedTool:
const radius = segmentationModule.configuration.radius;
segmentationModule is part of cornerstoneTools, but luckily enough the module gets extended in ohifviewerxnat/extensions/xnat/src/init.js:
const config = Object.assign({}, getDefaultConfiguration(), configuration);
extendSegmentationModule(segmentationModule, config);
with extendSegmentationModule defined in ohifviewerxnat/extensions/xnat/src/peppermint-tools/modules/extendSegmentationModule.js. The function getDefaultConfiguration() in init.js already attaches some HU gating related variables to the native cornerstone configuration, and I see it as a place to attach
our petThreshold as well:
const getDefaultConfiguration = () => {
        ...
        const defaultConfig = {
                ...
                petThreshold: 3,
                ...
        }
  ...
  return defaultConfig;
};
In extendedSegmentationModule.js we then copy the threshold to the segmentationModule configuration:
configuration.petThreshold=config.petThreshold;
The UI for segmentation settings is ohifviewerxnat/extensions/xnat/src/components/XNATSegmentationSettings/XNATSegmentationSettings.js, where we generate another custom slider for PET threshold. The step and max should still be configured - on true PET images they should be in units of SUV, for test image (uncorrected) I set a broader range.
 const PETThreshold = (
    <div className="settings-group" style={{ marginBottom: 15 }}>
      <div className="custom-check">
        <label>PET Threshold</label>
      </div>
      <CustomRange
        label="PET Threshold"
        step={100}
        min={0}
        max={10000}
        value={configuration.petThreshold}
        onChange={event => save('petThreshold', parseInt(event.target.value))}
        showValue
      />
    </div>
  );

   return (<div className="dcmseg-segmentation-settings">
           <div className="settings-title">
           <h3>Mask ROI Settings</h3>
           <button className="return-button" onClick={onBack}>
                        Back
           </button>
           </div>
           {BrushSize}
           {SegmentFill}
           {SegmentOutline}
           {PETThreshold}
            </div>
        );
Adding pipeline
Adding pipeline on database server
Database server is a server, that stores data. In our case,that is either Merlin (FMF) or ONKO-NIX (OI).
Installation steps
Software installation
- Perform ssh to database server:
ssh nixUser@server.adress - Install analysisModule as
tomcat8:
su nixManager
sudo su tomcat8
cd ../labkey/externalModules/analysisModule/ - Install websocket as
nixUser:
ssh nixUser@server.adress
cd software/src/websocket
Use git to download and install the packages.
Database setup (Labkey):
- Create project called
Analysisand a subfolder of type Study calledRun. - Import list archive from
analysisModule. - The archive contains four lists:
-
runswhich keeps track of jobs performed (or running) -
parameterFileswhich lists json files to be applied at processing server. The list points to files loaded toconfigurationinAnalysis/Run. -
runStatuswhich lists the possible status values of jobs -
scriptswhich lists potential analysis algorithm. More on convention for passing script in separate section
-
- Create a dataset called Runs where each line corresponds to a fully fledged instruction, composed of an arbitrary ID, the script to be run, associated parameter file and server location, which is either
localor contains an IP of a server wherewebsocketServeris running. A sample dataset is part of the zipped study which is part of analysisModule.
Processing instruction convention
Location of scripts
The actual scripts and associated files should be available on processing server (see separate instructions on adding a new processing machine). A replacement string _softwareSrc_ points to a common directory of all installed scripts on processing server.
Virtual environments
Should the script require a particular environment, the name of the script can be codded as two items separated by a colon. The first item is the name of the virtual environment, path to which should be supplied in the local .labkey/setup.json as ["venv"][name] on processing server. This implies that the actual virtual environment is installed at that location.
How to setup a virtual environment - example with instructions: websocket.
Requirenments for our virtual environments - labkey, socket, nnUNet: venv
Starting the script
A script, packed in the Runs dataset is run by checking the doRun check-mark. This adds an entry to runs list. Upon completion, the associated log file will be part of the runs list. In the log file, completed actions can be seen, as well as any possible mistakes.
Labkey Virtual Machine
Labkey virtual machine setup (merlin, onko-nix)
Documents related to virtual machine setup.
Notes on disk management. Growing file system works by creating new partition. Watchout - the last command is called xfs_growfs.
Notes on installation on virtual machine.
Docker
Setup of docker for labkey on git0.
Post-install tasks (handled by image/compose.yaml):
- link files: Files are linked to
/data/labkey/fileson docker, separate from home or similar directories - line externalModules (links from
/home/labkey/externalModuleson host or override inbin/env.sh,compose.yaml) - update R packages (moved to image)
docker exec -it config_labkey-web_1 bash
#system install should be taken care of by Dockerfile
#sudo apt-get update
#sudo apt-get install libcurl4-openssl-dev libxml2-dev libssl-dev libfontconfig1-dev  libharfbuzz-dev libfribidi-dev libtiff5-dev git
/usr/local/tomcat>R
>install.packages('devtools')
>install.packages('ggtools2')
Update scripts running on labkey PC
-
Install websocket on labkey docker, not required, analysisModule uses java WebSockets directly:
docker exec -it config_labkey-web_1 bash /usr/local/tomcat>cd /home/labkey>mkdir -p software/src /home/labkey>cd software/src /home/labkey/software/src>git clone https://git0.fmf.uni-lj.si/studen/websocket /home/labkey/software/src>sed 's/origin=\".*\"/origin="labkey-vm"/' send.py #update origin to labkey-vm /home/labkey/software/src>cd /home/labkey>mkdir venv /home/labkey>sudo apt-get install virtualenv /home/labkey>virtualenv venv/socket -p python3 /home/labkey>. venv/socket/bin/activate /home/labkey socket >pip install websockets /home/labkey socket >deactivate #test /home/labkey>~/venv/socket/bin/python ~/software/src/websocket/send.py onko-nix.onko-i.si:TEST:1 #this probably fails, see steps below #copy scripts/runPythonLog.sh or use python directly in analysisModule (TODO!) -
Run server on host, ie.
labkey-publicoronko-nixor whatever:- Set
IPSERVERto externaleth0or like address. - Set
IPCLIENTto internal docker network address. - Run
open_port.sh. If needed, delete obsolete 8765 directives withiptables -Dinstead ofiptables -Aoriptables -D. Sincelabkey_networkis set to use range, it is enough to use masks, 172.16.1.0/24, say. - Edit
websocketServer.pyand addlabkey-vmto origin (this is why previous test failed) - Start,
websocket/serviceScripts/start.sh - Do the suggested monitoring, websocket, also previous point
- Set
-
Update server on work pc,
rubens,vangogh, etc.:- Stop server,
websocket/serviceScripts/stop.sh - No changes to
iptablesare needed, since IP address will be the same as for docker host - Edit
websocketServer.pyand addlabkey-vmto origin (this is why previous test failed) - Start server,
websocket/serviceScripts/start.sh - Do the suggested monitoring, websocket, including
labkey-publictovangoghand docker tovangogh,
/home/labkey>~/venv/socket/bin/python ~/software/src/websocket/send.py vangogh.fmf.uni-lj.si:TEST:1 - Stop server,
Accessing NIX secured web pages
NIX certificate authority
All NIX sites are protected with NIX certificates, generated with NIX certificate authority. Since NIX is not a globally trusted entity, NIX certificate must be added to the list of browser trusted sites by hand.
Below is a list of instructions for different browsers:
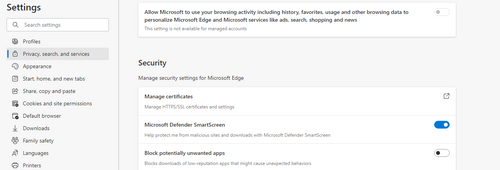
Edge
Click on the menu (three dots)
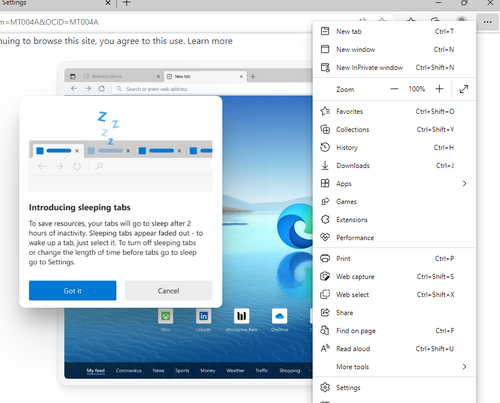
Select settings (way down in the menu). Then select Privacy, security and services in the left menu, and scroll down to Security, select Manage certificates.
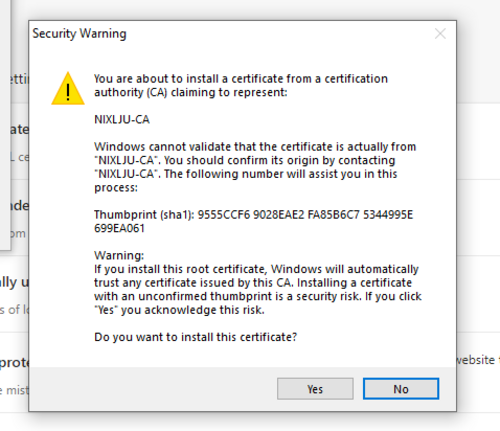
In Certificates pop-up, select Trusted Root Certification, and click on Import( followed by Next)
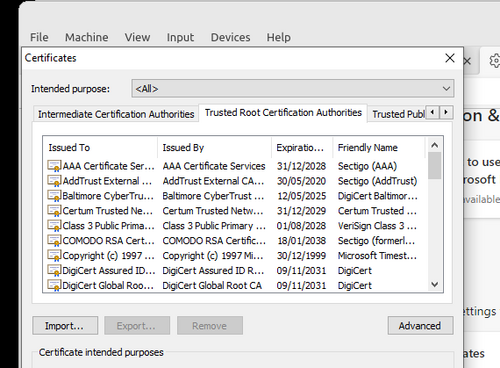
Navigate to the certificate file available below:
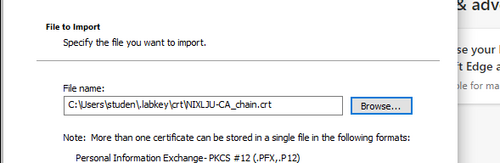
Add it to the Trusted Root Certification Authorities and confirm your choice.
Rubens Installation
Inserting a disk
Did the same as for merlin disk. The attached file reports on how the disk was configured with fdisk. One thing to notice is that dos disklabel type was set.
To use partprobe, package parted must be installed.
sudo apt-get install parted
After the whole procedure (including xfs_grow), this is the disk layout as reported by fdisk:
Disk /dev/sda: 3.7 TiB, 4000787030016 bytes, 7814037168 sectors
Disk model: ST4000VN006-3CW1
Units: sectors of 1 * 512 = 512 bytes
Sector size (logical/physical): 512 bytes / 4096 bytes
I/O size (minimum/optimal): 4096 bytes / 4096 bytes
Disklabel type: gpt
Disk identifier: EE02513B-3BCE-704C-AA8E-F32E63FDC0E6

Device     Start        End    Sectors  Size Type
/dev/sda1   2048 7814037134 7814035087  3.7T Linux filesystem
and df -h:
/dev/sda1 3.7T 28G 3.7T 1% /data_hdd
Adding external disk for cold storage
-
Find inserted device. Usb will create
/dev/sdbor a similar entry point for inserted USB drives.$ sudo dmesg -
Check partitioning. More likely than not, a partition was already created, but it might be
a less resilient MS type and format. The second command allows to modify partition, to change
follow instructions, but typically it should betfollowed by20for Linux filesystem and
awto write changes$ sudo fdisk -l /dev/sdb $ sudo fdisk /dev/sdb -
Reformat to linux resilient
ext4format for storage$ sudo mkfs -t ext4 /dev/sdb1 Superblock backups stored on blocks: 32768, 98304, 163840, 229376, 294912, 819200, 884736, 1605632, 2654208, 4096000, 7962624, 11239424, 20480000, 23887872, 71663616, 78675968, 102400000, 214990848 $ sudo lsblk -f /dev/sdb1 NAME FSTYPE LABEL UUID FSAVAIL FSUSE% MOUNTPOINT sdb1 ext4 2fde7150-8c3a-444d-b715-a3136e9da3c3 $ sudo mkdir /mnt/backup $ sudo mount /dev/sdb1 /mnt/backup/
NIXfying code
Making the code NIX compliant
Background
NIX
Network of imaging excellence is an initiative for harmonized and standardized infrastructure and environment for multi-center trials that involve imaging data. NIX relies upon a combination of database (current LabKey driven), analysis code and good clinical practice to maximize yield of clinical studies involving quantitative imaging biomarkers.
NIX database layout
NIX relies upon standardized layout of the database for software analysis to run smoothly. However, deviations from the base are possible and can be provided in configuration files.
NIXfication of a code
Initial assumptions
For code to be NIXfiable, we provide a loose set of guidelines that encompass general properties of QIB based data analysis.
Programing language
The most simple case is a python based code. If your code is not python based, a python wrapper that calls your code is required. Such wrapper should provide file and outcome management and wrap database calls.
Database access
Database access is provided through labkeyInterface based calls. Rather than loading the package directly, we strongly suggest to use nixSuite as the singular access point for all NIX based software. nixSuite provides getWrapper() routine which in turn allows to perform wrapper.loadLibrary() calls that will load latest version of labkeyInterface and similar tools. nixSuite is normally provided in computing environments that are controlled by NIX. To download data, use labkeyDatabaseBrowser.selectRows() and for files, labkeyFileBrowser.readFileToFile(). More details are available at git0.
Output
We expect the output to come in forms of tables (ntuples, if you want), with multiple variables per data entity. Also, files could be generated, which can be attributed to data item, qualified by id, a visit id and potentially sub-qualifiers (person doing the analysis, version of the analysis software, etc.)
NIX requirements
Main routine
The code should be packed into a python script that provides a main routine, which can take a single parameter, which is a configuration file. We encourage the file to come in json format, but the code can run with any format.
def main(parFile):
   doStuff
Sometimes it pays to end the file with:
if __name__=="__main__":
        main(sys.argv[1])
which allows to test the algorithm locally via:
python script.py parameters.json
Server setup
The job can refer to a local configuration file that provides paths to local copy of nixSuite and other common programs matlab, etc. In code, it can be assumed that this configuration is available from os.path.join(os.path.expanduser('~'),'.labkey','setup.json'), and has at the minimum, the following properites:
-
paths-
nixWrapper: path to the wrapper; add this tosys.pathto be able toimport nixWrapper -
softwareSrc: path to expanded software. Normally not needed, but if you are combine algorithms from different projects, here is where you would expect to find them
-
-
venv- dictionary of locations of different virtual enviroments that are available. Normally not needed in code, but useful in specifying (or checking) for codes that can be used inscriptsspecification, see below
Optionally, setup.json can provide additional software:
-
paths-
matlab: path to matlab executable -
gzip: path to gzip executable -
generalCodes: path to generalCodes, a package of matlab codes from UW, see git0 -
nnUNetRunInference: path to installednnUNetcode
-
Getting to labkeyInterface from main:
import os
import json
import sys

def main(parFile):
        setupFile=os.path.join(os.path.expanduser('~'),'.labkey','setup.json')
        with open(setupFile,'r') as f:
                setup=json.load(f)
        sys.path.append(setup['paths']['nixWrapper'])
        import nixWrapper
        nixWrapper.loadLibrary('labkeyInterface')

        import labkeyInterface
        #do something with labkeyInterface
Handling output
Output should be transmitted back to the data server. All files should be placed in the project directories, which can be created via labkeyFileBrowser.buildPathURL(),
and finally labkeyFileBrowser.writeFileToFile() to copy the actual file. All tuples should fill logically fitting datasets (for id/visit identifiable data) or list (to avoid id/visit requirement, where multiple entries for id/visit are foreseen), and use labkeyDatabaseBrowser.modifyRows('insert',...) or labkeyDatabaseBrowser.modifyRows('update',...) accordingly to either insert or update entries. While not enforced, local computing directories could get deleted.
Parameter file
The parameter file supplied should direct operation of algorithm, including names of relevant datasets, common directory names, filtering of participants for analysis and similar. The actual use is left to the user. A copy of the parameter file will be available in the Analysis project under jobs/ID for later reference.
Distributing the code
A copy of the code
The code should be available at the engine which will perform the analysis. (This is still being implemented). At NIX managed workstations, a nixWorker account is the target user that will perform analysis, so the code should be unpacked to its software/src directory. It is up to the user to maintain the code and provide updates. For people without access to the NIX workstations, the installation of the code will be performed by NIX managers.
Server setup (NIX managers only)
The user nixWorker has a configuration file that provides local copy of nixSuite and other common programs matlab, etc. In code, it can be assumed that this configuration is available from os.path.join(os.path.expanduser('~'),'.labkey','setup.json'), and has
Analysis setup
-
Parameter file. In Analysis project, one should copy a version of the configuration to the configuration directory.
-
parameterFiles is a list in Analysis project, where one should add the exact name of the configuration file copied in previous step.
-
scripts is a list, where we specify the details on which script to use. In
Path, the format of script path specification isVENV:PATHwhereVENVis the name of virtual environment needed to run the algorith, andPATHis the path of the script.PATHcan include a mock variable_softwareSrc_which will expand tosoftware/srcor similar directory on the operating machine. This is qualifed in the./labkey/setup.json, see above. Typicall setting is:PBPK:_softwareSrc_/PBPK/pythonScripts/runSolver.py -
runs, where you combine a script and parameter file, specify job as
local, which is to be run at LabKey instance, or give name/IP of the server (at OIL, it is IP, at FMF, it is the name), and specify job aspython. If the parameter file is ajsononvangoghone can override the names of variables in setup file by specifyingparameterOverloadvariable with a series of semicolon delimeted instructions, where each instruction is of form FILENAME:VARIABLE=VALUE, and works for simple types only. One can also specify CPU range, useful for limiting job to a small number of CPU, but with a drawback that the job will wait for those specific CPUs to be available. See [example][Screenshot at 2023-03-08 11-24-58.png]
Running the code
In Analysis, select the entry in edit mode, mark doRun and Submit.
Add new processing machine
Adding a new GPU server/user
Installation steps:
- Add local user on processing machine via
adduser - Install websocket for that user.
- Install analysisInterface since
websocketwill delegate processing torunAnalysis. - Install potential other software, depending on what script in
Analysis/Runsneed. Perhaps such scripts might require virtual environment, check with particular code (e.g. irAEMM, nixSuite, SegmentationModels,...)
Processing software
The websocket and analysisInterface code will look in .labkey/setup.json to replace _softwareSrc_ with locally adjusted ["paths"]["softwareSrc"].
_softwareSrc_ is a shortcut/replacement string coded into Analysis/Runs scripts on labkey/merlin.
If a script requires _softwareSrc_/A/B.py, there should be a script under ["paths"]["softwareSrc"]/A/B.py on vangogh for the user you created.
In .labkey folder, there should also be a network.json file, which will enable the connection to database server. This file includes certificates (if needed), username and password.
Managing nixWorker account
NIX worker
NIX worker is a generic name for user that performs analysis when prompted by the a NIX user.
NIX worker setup
Create and scaffold
sudo adduser nixWorker
sudo su nixWorker
cd
mkdir venv
mkdir -p software/src
mkdir analysis
mkdir logs
mkdir .labkey
cd .labkey
#edit file, add username and password
vi onko-nix.json
#edit paths
vi setup.json
Virtual env
Get list of venv from git0
Deep medic (non-GPU)
Deep medic segmentation
Installation on analysis machine
From email to Daniel Huff:
Starting from deepMedic, I know that version v0.7.4 that we use for segmentation runs with tensorflow==1.15.5 which in turn is fixed to CUDA-10.0 and cudnn-7.6 which don't even support ampere GPU architecture embedded in A5000.
So, deepMedic will not work on a GPU, but might run on CPU. The attached file shows python virtualenv layout used on vangogh.
Install Python
Python-3.6.14 was used on vangogh. To get it, download it from python web page, do the install. Virtualenv is created and software installed via:
cd software/install/Python-3.6.14
bin/python -m ensurepip --default-pip
bin/python -m pip install --upgrade pip
./python -m venv ~/venv/segDM
. ~/venv/segDM/bin/activate
pip install --upgrade pip
#comment out deepmedic and pkg-resources lines with #
pip install -r requirementsDM.txt
Install deep medic from repository
Install deepmedic (still in venv):
cd ~/software/src
git clone https://github.com/Kamnitsask/deepmedic/
cd deepmedic
git checkout tags/v0.7.4 -b branch_v0.7.4
pip install .
Now deepmedic should work:
deepMedicRun -h
Update paths
Open setup.json and add
"deepMedicRun":"/home/nixWorker/venv/segDM/bin/deepMedicRun"
Sometimes user is not nixWorker, so pay attention.
Using Analysis from labkey
parameterFile
For parameter file, a good template is available at irAEMM git repository. Upload to configuration and add to parameterFile list.
scripts
It is safe to use iraemm virtual env, so standard script path entry to scripts list would be:
iraemm:_softwareSrc_/irAEMM/pythonScripts/runSegmentationDM.py
Although, runSegmentationDM.py is not so picky in terms of additional python libraries and venv could be better tailored, should it be needed.
Runs
In formating the Runs entry, from obviously using the configured parameterFile and scripts list entries, runType should be python and server should point to the server used in the install step (works on rubens, not done on vangogh since most of the data is at onko-nix.
Entry filtering
There is the parameterOverload field to play with, particularly in setting entryFilter values. Here, one should specify both the name of the configuration file, the variable and the value, which should be JSON formatted, including (double) quote marks. For filtering on patientCode and visitCode, the entry in parameter overload should be:
segmentationIRAEMM_ONKO_retro_DM.js:entryFilter=[{"variable":"patientCode","value":"1000_12","oper":"eq"},
{"variable":"visitCode","value":"VISIT_0","oper":"eq"}]
For filtering on lists using in filter, see here, one would have to use semicolons to separate values in filter. Since semicolon is already a marker for spliting variables in parameterOverload, runSegmentationDM.py uses parseConfig to replace __semiColon__ later on, so use this in place of semicolon within variables, like:
segmentationIRAEMM_ONKO_retro_DM.js:entryFilter=[{"variable":"patientCode","value":"1000_12","oper":"eq"},
{"variable":"visitCode","value":"VISIT_0__semiColon__VISIT_1","oper":"in"}]
Debugging
analysisModule
Sometimes, analysisModule fails to find appropriate binaries to run the code. Check in Server Javascript Console where exact shell command is reported, and update externalModules/analysisModules/scripts/analysisModule/analysisFcns.js. The strategy was somewhat robustified, but some servers might still use different paths for invoking python on the server. A log of the transaction is recorded in ~tomcat8/logs/analysisModule/runRef.log, where runRef is assigned and recorded in the runs list.
analysisInterface
Analysis interface connects the analysisModule and the underlying python script by running:
~/software/src/analysisInterface/runAnalysis.py CALLER ID
It is run both when a local job is submitted as well as when the remote job is started, ensuring symmetry in job execution. In remote mode, output of runAnalysis is reported by the websocket server in ~/logs/socketServer.log. To debug, above command can be run by the same user that is running websocket, typically nixWorker, where CALLER is an abbreviation of the labkey server that emitted the request and ID is the Key of the line in runs list.
~/software/src/analysisInterface/runAnalysis.py onko-nix 659
Analysis interface will prepare ~/analysis/runRef directory where segmentation file will be copied and runRef.log will show output of the underlying script, which is later copied back to calling server and available under log link.
runSegmentationDM
One can execute runSegmentationDM.py directly on the server,
~/venv/nnUNet/bin/python ~/software/src/irAEMM/pythonScripts/runSegmentationDM.py ~/analysis/runRef/configuration.json
where nnUNet is a suggested, but by far not the only virtual environment (see above), and runRef should be replaced by a valid runRef from the runs list. This is only a help to get a valid configuration.json file, where configuration should be replaced by the actual name of the file (see parameterFile above). One can edit both the py script and configuration file until the code runs appropriately. In this case, the output is directly in the terminal.
Labkey-UKC
Labkey UKC
Available at 10.3.249.171.
Labkey
Installed labkeyDocker in /home/labkey (port 8081) and /home/labkey1 (8082, dedicated to pharmaceutical use).
Orthanc
Installed dockerOrthanc. Standard user/password, port 8042.
Software (nixWorker)
Slicer
Install dependent software:
sudo apt-get install libpulse-dev libnss3 libglu1-mesa
sudo apt-get install --reinstall libxcb-xinerama0
sudo apt-get install libasound2
sudo apt-get install '^libxcb.*-dev' libx11-xcb-dev libglu1-mesa-dev libxrender-dev libxi-dev libxkbcommon-dev libxkbcommon-x11-dev
Get Slicer from the link (at the moment, the link looks like this https://download.slicer.org/bitstream/64e0b4a006a93d6cff3638ce, but it is actual .tar.gz).
Get SlicerLabkeyExtension and associated xpra to run fake X on headless server.
sudo apt-get install xpra
Testing by running:
~/software/install/SlicerLabkeyExtension/slicerScripts/runSlicerFg.sh test.py
where test.py has a single line with a print command and a quit().
Matlab
For matlab, see installation at VanGogh.
DynamicSPECT
For dynamicSPECT, the dependencies are (requirements.txt is part of dynamicSPECT distribution):
sudo apt-get install virtualenv
Install dynamicSPECT and setup virtualenv to run dynamicSPECT python code:
git clone https://git0.fmf.uni-lj.si/studen/dynamicSPECT.git
virtualenv ~/env/dynamicSPECT -p python3
. ~/env/dynamicSPECT/bin/activate
pip install -r requirements.txt
Analysis interface
virtualenv ~/venv/labkey -p python3
cd ~/venv/labkey
wget https://git0.fmf.uni-lj.si/studen/venv/raw/master/labkey/requirements.txt
pip install -r requirements.txt
git clone https://git0.fmf.uni-lj.si/studen/analysisInterface.git
Setup remote connection in labkey-ukc.json. Edit setup.json, add analysisInterface under venv:
{"venv":
{ "analysisInterface":"/home/nixWorker/venv/labkey"}
}
Analysis module
Project setup
Add WithStrings view to runs list. Correct server in log and logDirectory fields.
Labkey side, docker container
cd ~/labkey/externalModules
git clone https://git0.fmf.uni-lj.si/studen/analysisModule.git
cd ~/labkey/software
git clone https://git0.fmf.uni-lj.si/studen/websocket.git
cd websocket
#change origin to labkey-ukc in send.py
docker network inspect labkey_network
#this lists ip of the client,
#server is the same subnetwork, just replace last digit with 1
#X.X.X.n -> X.X.X.1
#this should be used in Analysis/Run setup
Analysis side, nixWorker
cd ~/software/src
git clone https://git0.fmf.uni-lj.si/studen/websocket.git
cd websocket
#add labkey-ukc to list of origins in websocketServer.py
cp serviceScripts/env.sh.sample serviceScripts/env.sh
vi serviceScripts/env.sh
#change IPSERVER to ip address glimpsed from docker network inspect
./serviceScripts/start.sh
#stop can be done from different terminal,
./serviceScripts/stop.sh
Test from Labkey side
As labkey user
docker exec -it config-labkey-web_1 bash
#IP is the IPSERVER address set above
~/software/src/websocket/send.py IP:TEST
On the analysis side, as nixWorker user:
cat ~/logs/websocketServer.log
<<< FROM: X.X.X.1
<<< X.X.X.3:TEST
Test
QSPECT
Running QSPECT suite
-
Open
C:\Users\studen\software\build\QSPECT\QSPECT_suite.exe -
Load photopeak
Point to NM0000XXXX.dcm -
Resize image if needed/wanted.
Tools -> Resize 1/2 -
Run AC-less reconstruction.
Set Iterations=1, Subset=10, mark Double headed SPECT and Use GPU.
Save NAC reconstruction (Involution_1i_10s_NAC.nii, optional). IMPORTANT: always save via File -> Save as Nifti. -
Load CT
Loading CT prior to reconstruction won't work, because CT is resampled to SPECT. Select Folder (CT)
For patinets reconstruction: need to first order CT images (pydicom, some CT's already are), then split files to upper (torax) and lower (abdomen) part of CT image. -
Run ACQC
Tools -> ACQC. Correct position of CT to match SPECT. Save screenshot (snipping tool) of the fused/registered images in reconstruction file.
- phantoms: normally, one bin in Z, optionaly use translation/rigid registration
- patients: HARD TASK! Try manually correct CT (look at chin, arms, bladder ect.), then use rigid transformation (beforehand try translation)
--> for more: "A quantitative reconstruction software suite for SPECT imaging" (M. Naimas, R. Jeraj)
-
Reconstruct with AC
Set Iterations=3, Subset=10, mark Double headed SPECT, Use GPU for resized images, for non-resized often only CPU works. Use conbinations of CTAC (CT Attenuation correction), SC (Scatter correction) and PSF (Point spread function). For non-resized images use CTAC and SC combination. -
Store reconstruction
to the same directory where SPECT and CT directories are or separate dir: reconstruction
name (automated): Involution_3i_10s_AC_SC.nii - carefull with names for resized (w/o appendix) and non-resized images (add appendix -full) - save the latter reconstruced of the two in other file, rename it, and put in in reconstruction file, as they have same automated name and second overwrites the first one!
Web Page
Start web page
How to start a web page locally from sql and directory zip.
Required resources:
- local user
wordpress - disable login to user with
sudo passwd -l wordpress - webpage.zip and webpage.sql files
- directory
/someplace/wordpress, in continuationexport X=/someplace/wordpress -
cd X; unzip -x webpage.zipshould give you$X/webpagedirectory -
mkdir $X/mysqlto host webpage - since docker container runs as some curious user,
chmod a+w $X
Start the database
mariadb-compose.yaml:
#Use root/example as user/password credentials
version: '3.1'

services:

  db:
    image: mariadb
    restart: always
    environment:
      MARIADB_ROOT_PASSWORD: db.root.pswd

    volumes:
      - /someplace/wordpress/mysql:/var/lib/mysql
docker-compose -f mariadb-compose.yaml up
This also creates the database with the root password given
Find IP of newly created db instance:
docker network ls
docker inspect id
In my case, the container was labeled config_db_1, and by looking at output of docker inspect, the relevant ip was 172.18.0.2
To connect, I installed mysql-client locally (ie on host) and did
#>mysql -h 172.18.0.2 -pdb.root.pswd -u root
mysql>
Using the same settings, import the sql file
#>mysql -h 172.18.0.2 -pdb.root.pswd -u root < webpage.sql
The last missing piece is the user in wp-config.php. Look for lines
/** The name of the database for WordPress */
define('DB_NAME', 'webpage');

/** MySQL database username */
define('DB_USER', 'webpage.user');

/** MySQL database password */
define('DB_PASSWORD', 'webpage.user.pwd');
Create user webpage.user and grant all privileges on webpage database:
create user 'webpage.user'@'%' identified by 'webpage.user.pwd';
grant all privileges on webpage.* to 'webpage.user'@'%';
Check if connection works:
#>mysql -h 172.18.0.2 -pwebpage.user.pwd -u webpage.user webpage